Showing posts sorted by relevance for query diy. Sort by date Show all posts

7.24.2016

School DIY: Tumblr Collage Notebook


Don't you just love all the colors of this notebook?!?

This is my blog notebook actually! It's just a simple composition notebook that you can get from basically any school supplies store. This DIY can be put on any type of notebook, folder, planner, or anything that has a cover on it. I've even seen laptops with these type of DIY. This is similar to the tumblr wall. There are really basic steps to doing this.

Step 1: Go onto pinterest or tumblr and find a couple of pictures that inspire you or that you like. (you can really go on any website to find pictures or you can use your own)

Step 2: Print and cut out all of your pictures to the size you want.

Step 3: Use Mod Podge or glue to stick each photo down.

(optional) Step 4: To finish off, use a paint brush to apply a thin layer of Mod Podge over all of your pictures to seal them down. 

This is a super fun and cute way to spice up your school supplies. I made 2 of these notebooks and I took pictures of both. Some of my friends saw them and they said things like, "Please sell these" and "These are so cool, I would buy one." These notebooks will definitely draw attention. (in a good way)  Click here to go to my pinterest account to find all the these exact pictures.

xoxo
Olivia

7.21.2016

DIY Planner Ad-in

(see bottom for more detailed explanation)


Planner: Target
Washi-Tape: Walgreens
Scrapbook Paper: Tuesday Morning

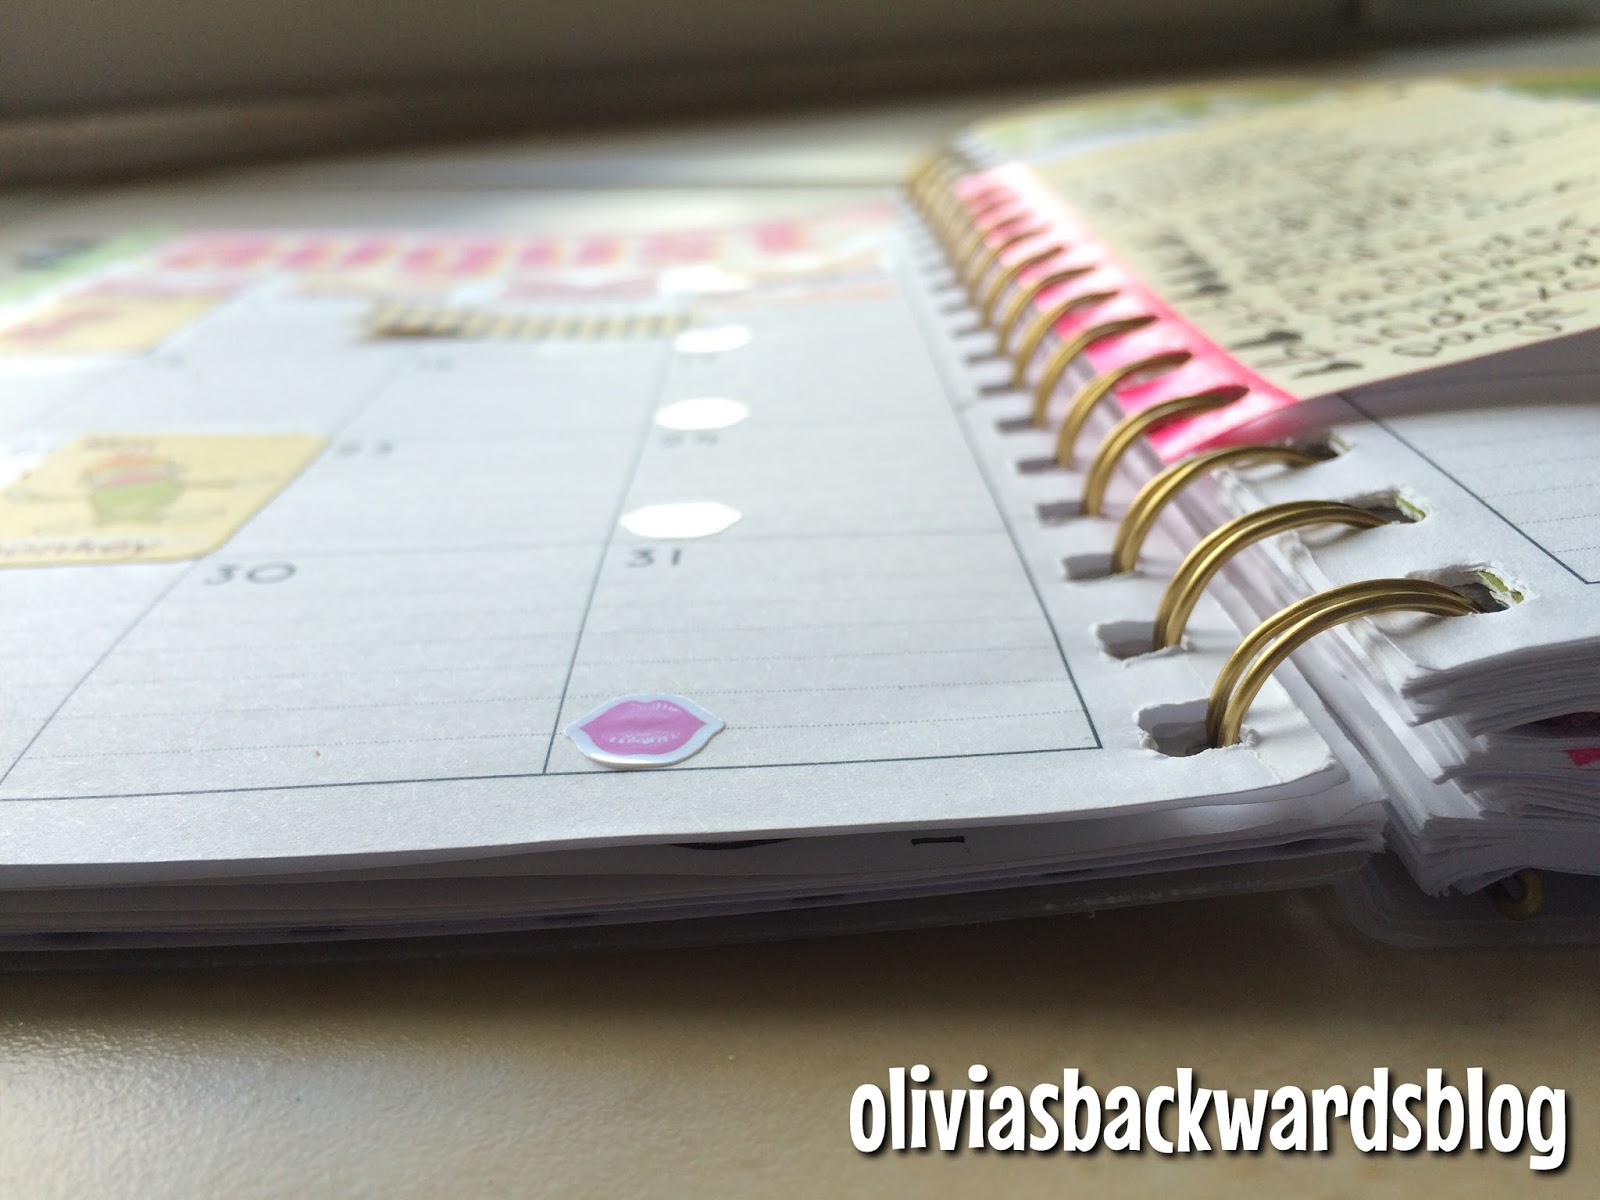
In my last post, I said I would make a post about how to make the ad-in you saw. So here it is!

Steps:
1. Cut out the size you want the ad-in to be using the scrapbook paper. I recommend using a ruler to get straight edges or just 'eye it' like I did.
2. Cut a piece of washi-tape a little bit longer then the paper itself and place it just a little less then half way on the front.
3. Flip the paper over and cut another piece of washi-tape and place it directly on top.
4. Align the paper and tape to the spiral.
5. Using the pen, draw dashes to mark were each spiral meets the tape.
6. Hole-punch where each dash is. Try to get them in a straight row. You can use a ruler to help straighten them.
7. Cut a rectangle out of each hole-punch to make an open circle type shape.
8. Place in your ad-in.
That's it!!!

If your planner doesn't have very much note space, you can make these big enough to fill the whole page. I like making these if I have to put in lists for a month or a week. And the best thing is, if you have to reschedule something that you wrote on your ad-in, you can just move it to a different week!

xoxo
Olivia

7.20.2016

DIY August Planner Decoration


Scrapbook Paper: Tuesday Morning
Washi-tape: $1 section in Target
Page Flags: $1 section in Target
Silver Glitter Duct-tape: Walgreens
Stickers: Target

For back to school season, I decided to decorate the month August in my planner/agenda. In my planner, each month has a theme. Since I go back to school in August, I made a school-ish theme. I cut-out rulers, alphabet cards, lined paper, and all different types of patterns that I got from a scrapbook paper set. 

I used scrapbook paper for all of the cut-outs you see here. I used washi-tape for the boarder and to keep the add-in on, and I used stickers to mark important dates. I went to a store called Tuesday Morning and bought 3 scrapbook paper sets for $15 with 240 sheets each. I cut out different shapes, sizes, and patterns to go with a certain part of the month. 

To put the days of the week, I cut a striped pattern into squares. Then, I cut a triangle into the square to make it seem like a flag. I glued it down and that's it!

I got the cut-out of the word 'August' from a pattern in the scrapbook set. I also found the alphabet cards from a sheet. For the add-in paper you see on the spiral, I will make a separate post about how to make that but it's extremely simple.

xoxo
Olivia


7.22.2016

DIY Tumblr Photography Wall


This colorful wall of photos is what I call a tumblr wall. It's colorful, inspirational, and super pretty. 

All you have to do is go on pinterest or tumblr and find photos that inspire you or that you just like to look at. Print them all out and if you want, you can leave a thin white boarder or you can cut them completely. To stick them to the wall, you can either use a disappearing purple glue-stick or sticky tabs. If you are using glue, make sure its disappearing purple. Any other type won't let the pictures come off and they could peel and ruin the paint.

I used disappearing purple glue and I can switch out the pictures and move them around without ruining the walls. I only put 24 pictures on the wall but I plan to add more! 

A really good word to search when looking for quality photography is "adventure" on pinterest. You could also search "tumblr photography". I like to search things like "pineapple tumblr photography" or "donut tumblr photography". They all give really good results.

If you want these exact pictures, you can click here and it will take you to my pinterest account.

xoxo
Olivia